Fresh strawberries covered in rich chocolate are one of the most impressive-looking yet essentially simple desserts you can make, and the outcome is a harmonious combination that brings together sweet, tart, and bitter flavors. Whether you keep things uncomplicated (oh, the happiness of a two-ingredient recipe!) or add toppings that match your fancy, your final productions are sure to delight. As you get ready for your Valentine’s Day dinner in your home, think about including these sweet bites to the dessert menu.
The Strawberries
First, make certain to choose the best strawberries for the task. We recommend avoiding giant-sized berries when shopping. They may seem luring (after all, more strawberry means more chocolate), but smaller ones are generally more delicious– they’re sweeter, with a more intense strawberry flavor. Depending upon the time of year, you may not have numerous alternatives, however search for fruits that are deep red (no white shoulders) and approximately the very same size. An added bonus: Berries with decent-sized stems you can hang on to when dipping.
To prepare the berries for dipping, carefully wash them in water and let them dry totally on fabric or paper towels (any wetness will avoid the chocolate from adhering).
The Chocolate
You can use chopped dark, semisweet, or white chocolate. About 8 ounces of chocolate ought to cover 1 pound of berries. Avoid using chocolate chips, since they generally have included active ingredients that help them to preserve their shape when heated and won’t melt down efficiently. To accomplish a snappy chocolate shell over the strawberry and a shiny shine, your best option is to temper the chocolate:
Bring a saucepan with 2 inches of water to a simmer. Place a metal bowl including 2/3 of the chocolate over the water in the pan; stir until the chocolate melts.
Immediately remove the bowl from the pan, include the remaining chocolate, and stir strongly.
Reheat the chocolate briefly by positioning the bowl back over the saucepan (the perfect temperature level is 89 degrees Fahrenheit– you can utilize a candy thermometer to inspect this.
The Dipping
This is the fun part. You’ll need a baking sheet lined with parchment or wax paper to catch drips of chocolate and prevent the strawberries from sticking to the baking sheet.
Working with one strawberry at a time, dip into the bowl of chocolate, twirling the strawberry in the chocolate to coat.
Let any excess chocolate drip back into the bowl, then place the coated strawberry on the lined baking sheet to set.
Repeat with staying strawberries.
Optional Extras
Naturally, chocolate and strawberries together are tasty, but why not take things up a notch? If you’re using white chocolate and want to tint it before dipping, use a powdered or oil-based color. For powdered color, include it as quickly as the chocolate starts to melt; for oil-based dye, stir it in after the chocolate melts.
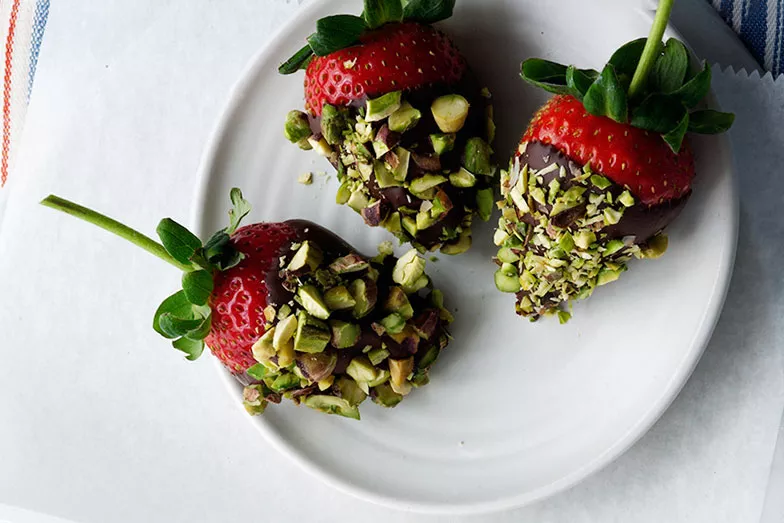
Toppings can also be enjoyable and include interesting flavors and textures to these deals with. Practically anything goes: crushed toasted almonds, peanuts, pecans, or pistachios; grated coconut; sprays; cookie crumbs; or freeze-dried berries are just a few of our preferred ideas. Extremely small pieces work best, so make certain to carefully slice any nuts or dried fruits first. Place the topping on a plate or shallow bowl and thoroughly roll the newly dipped strawberry in it (before the chocolate sets), pushing gently to assist the topping adhere. Then move to the lined baking sheet to set.
For How Long Do Chocolate-Covered Strawberries Last?
While you can make chocolate-covered strawberries ahead of time, they are preferably taken pleasure in quickly after dipping. If you make them on the day they will be consumed, do not refrigerate them. Drops of condensation might gather on the chocolate if they are stored in the fridge for more than an hour. If you do require to make them ahead, let them sit at space temperature level for 30 minutes before serving.